Overview
This Ethernet shield gives Arduino TCP/IP network access capability. Thanks to the onboard W5100 chip, TCP/IP stacks has already been implemented on this chip. Benefit from the integrated protocol stack, Arduino only need to operate on sockets, which dramatically reduces the complexity of implement TCP/IP connectivity and saves a lot of RAM and ROM space for user application.
The RJ45 connector is PoE compatible and there are mounting holes reserved for third party PoE module, such as Ag9000-s and PM1202. Both of the modules and the RJ45 connector are IEEE802.3af compatible.
Just like the official board, this board connects to Arduino with long-wire headers, which keeps the pin layout intact and allows another shield to be stacked on top. SPI connections are made via the ICSP header, so this shield is compatible with Mega too. The hardware design is functionally identical with the official Ethernet Shield Rev3.
Features
- PoE enabled RJ45 Magjack and reserved mounting holes for optional PoE module.
- Arduino Mega compatible, SPI communication via ICSP header.
- Dedicated power on reset IC onboard eliminating reset problem.
- Dedicated schimitt-trigger inverter IC deselects W5100.
- All status LEDs of W5100 are mounted.
- Arduino will not suffer from overheat when powered with 12V external supply
- SMT machine assembled and high quality PCB
Pin Configuration
- ICSP1: MISO
- ICSP2: 5V
- ICSP3: SCK
- ICSP4: MOSI
- ICSP5: Reset
- ICSP6: GND
- D4: Chip Select for TF card
- D12: Chip Select for W5100
- VIN: 4-12V Power supply*(supplied from Arduino Board)
*Note: The board will not work unless VIN is greater than 4V. If an external power supply is connected to the barrel connector on Arduino, the shield would be automatically powered up. If no external power supply is applied, power can be applied to the shield by shorting the VIN and +5V. PLEASE PAY ATTENTION: NEVER short VIN and +5V while an external power supply is applied, otherwise this may cause damage.
Quick Start Guide
The purpose of this guide is to give a quick demo on how to serve a static web page stored on SD card to a web browser. For more detailed tutorials and examples, please visit http://startingelectronics.com/tutorials/arduino/ethernet-shield-web-server-tutorial/SD-card-web-server
Step 1, First, format the TF card into FAT16 with a TF card reader. Create a text file named “index.htm” in the root directory of TF card. Copy the following html code into the text file and save it. After saving the file, the TF card is ready for use and can be inserted into the shield’s TF slot.
|
1 2 3 4 5 6 7 8 9 10 |
<!DOCTYPE html> <html> <head> <title>Arduino SD Card Web Page</title> </head> <body> <h1>Hello from the Arduino SD Card!</h1> <p>A web page from the Arduino SD card server.</p> </body> </html> |
Step 2, Attach the ethernet shield onto the Arduino board. Power the Arduino board and the ethernet shield. Connect the ethernet shield to the network by an ethernet cable. Copy the following code into a new sketch. Make necessary modification on the IP address in the source code. Upload the sketch to the Arduino board.
|
1 2 3 4 5 6 7 8 9 10 11 12 13 14 15 16 17 18 19 20 21 22 23 24 25 26 27 28 29 30 31 32 33 34 35 36 37 38 39 40 41 42 43 44 45 46 47 48 49 50 51 52 53 54 55 56 57 58 59 60 61 62 63 64 65 66 67 68 69 70 71 72 73 74 75 76 77 78 79 80 81 82 83 84 85 86 87 88 89 90 91 92 93 94 95 96 97 98 99 100 101 102 103 104 |
/*-------------------------------------------------------------- Program: eth_websrv_SD Description: Arduino web server that serves up a basic web page. The web page is stored on the SD card. Hardware: Arduino Uno and official Arduino Ethernet shield. Should work with other Arduinos and compatible Ethernet shields. 2Gb micro SD card formatted FAT16 Software: Developed using Arduino 1.0.3 software Should be compatible with Arduino 1.0 + SD card contains web page called index.htm References: - WebServer example by David A. Mellis and modified by Tom Igoe - SD card examples by David A. Mellis and Tom Igoe - Ethernet library documentation: http://arduino.cc/en/Reference/Ethernet - SD Card library documentation: http://arduino.cc/en/Reference/SD Date: 10 January 2013 Author: W.A. Smith, http://startingelectronics.com --------------------------------------------------------------*/ #include <SPI.h> #include <Ethernet.h> #include <SD.h> // MAC address from Ethernet shield sticker under board byte mac[] = { 0xDE, 0xAD, 0xBE, 0xEF, 0xFE, 0xED }; IPAddress ip(192, 168, 1, 177); // IP address, may need to change depending on network EthernetServer server(80); // create a server at port 80 File webFile; void setup() { Ethernet.begin(mac, ip); // initialize Ethernet device server.begin(); // start to listen for clients Serial.begin(9600); // for debugging // initialize SD card Serial.println("Initializing SD card..."); if (!SD.begin(4)) { Serial.println("ERROR - SD card initialization failed!"); return; // init failed } Serial.println("SUCCESS - SD card initialized."); // check for index.htm file if (!SD.exists("index.htm")) { Serial.println("ERROR - Can't find index.htm file!"); return; // can't find index file } Serial.println("SUCCESS - Found index.htm file."); } void loop() { EthernetClient client = server.available(); // try to get client if (client) { // got client? boolean currentLineIsBlank = true; while (client.connected()) { if (client.available()) { // client data available to read char c = client.read(); // read 1 byte (character) from client // last line of client request is blank and ends with \n // respond to client only after last line received if (c == '\n' && currentLineIsBlank) { // send a standard http response header client.println("HTTP/1.1 200 OK"); client.println("Content-Type: text/html"); client.println("Connection: close"); client.println(); // send web page webFile = SD.open("index.htm"); // open web page file if (webFile) { while(webFile.available()) { client.write(webFile.read()); // send web page to client } webFile.close(); } break; } // every line of text received from the client ends with \r\n if (c == '\n') { // last character on line of received text // starting new line with next character read currentLineIsBlank = true; } else if (c != '\r') { // a text character was received from client currentLineIsBlank = false; } } // end if (client.available()) } // end while (client.connected()) delay(1); // give the web browser time to receive the data client.stop(); // close the connection } // end if (client) } |
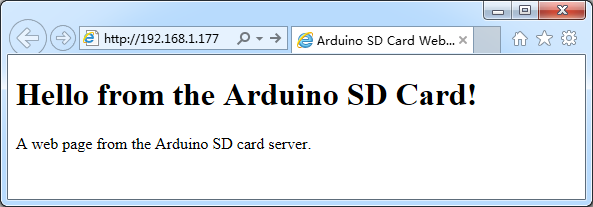
Step 3, Open a browser and type in the IP address that we have just used in the source code preceded by “http://”. In our case, it is “http://192.168.1.177”. The web page should be shown in the browser as below if everything is ok.
Resources
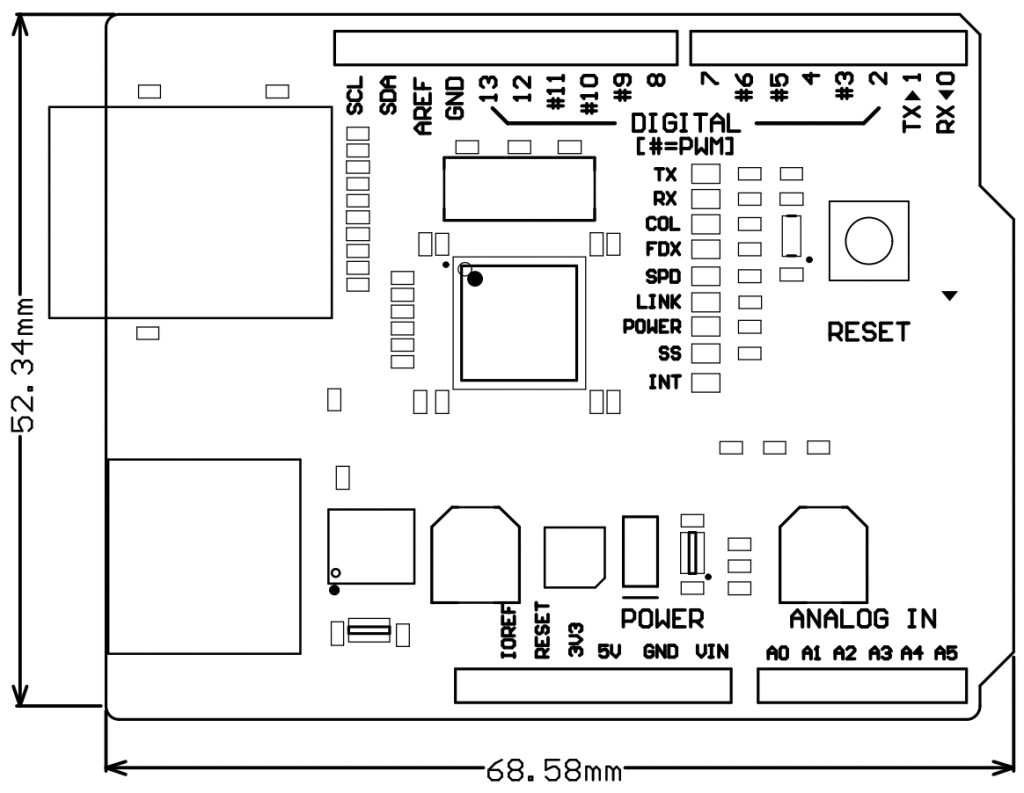
Dimensions